Running with Scissors…

…just a few of the things I’ve been toying with, in between renovations, life, working, volunteering and everything else…

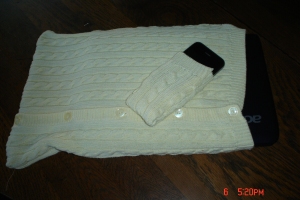
I needed a laptop sleeve, so I pulled out an old sweater and made a cozy….while I was at it, made a matching sock for my iphone.

Then I pulled out an old jacket and made a travelling pack for my phone…

And #1 son loves skateboarding brands but Mom and Dad are not so thrilled about the price tags on those things, so we decided to make one of our own using REVERSE APPLIQUE.  What a fun thing to do – I am sure we will be making more things using this technique….here’s how it works:

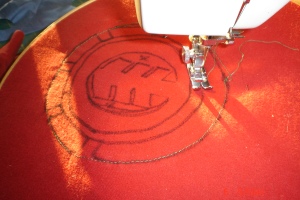
Using an embroidery hoop, we traced out the design we wanted to use using a washable marker:


Then we cut out a circle of what we wanted our background fabric to be, and stitched around the logo…(next time I will not choose one quite so complicated..it took too much thinking!)

Then we started thinking about which parts we wanted to keep and started cutting away the parts we didn’t:

tada….!  It looks even better now that it has been washed and the edges got a little ratty….not bad for a thrifted $1.49 t-shirt!

**

Today I did some cleaning in the studio, and it doesn’t usually take long in there for me to get creatively inspired…..I’ve been looking at Anthropologie’s site and think that I can do a whole lot better for a whole lot cheaper!

Check out my repurposed Doily Bib necklaces!
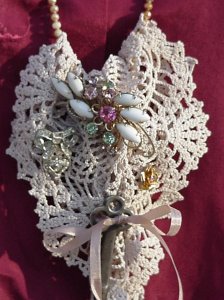
You can see more photos at http://www.etsy.repurposing.com

Made using a vintage Ten Commandments Charm Bracelet - see more photos at http://www.repurposing.etsy.com

Do I have to sew to REPURPOSE something?

With two immediate family members getting married in the next two weeks, I may be a little scarce around here so I thought I’d pass along some blog-love and show you some ideas that don’t include fabric.

I’ve mostly been into fabric lately, but that doesn’t mean my mind isn’t constantly working on ideas for other things lying around too!

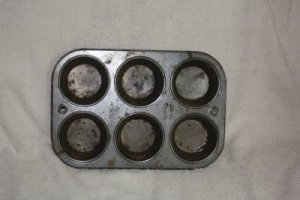
A recent commenter, recently took this:


muffintin1

and created this:

muffintin2

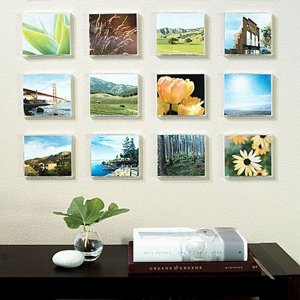
Or how about REPURPOSING all those old CD cases lying around?

cdcases

“From the book Photocraft: Cool Things to Do with the Pictures You Love: Scan or crop your images to the size of a CD case (5 3/8 in. wide by 4 5/8 in. high) then print on good photopaper and trim. We recommend using standard (not slim) cases. Discard plastic inserts. 

Back each photo with cardboard or foam board and snap the cases shut. Attach them to the wall with 3-inch strips of sticky-back hood-and-loop fasteners (such as Velcro). ”

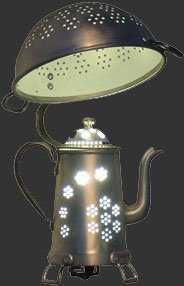
Those of you who speak French, might be inspired by this site:

kettle1

Anything lying around your house that you could look at differently?

*

Memory Quilt…..

Let me just say right up front, I am not a quilter…never done it, never thought I would explore it….but….last week while at the thrift store, some donations came in from someone’s mother who had recently passed.  I know the daughter as an aquaintance and I was overcome with a thought as I saw all those clothes.

It just seemed like there was SOMETHING that could be done to ease her grieving, at least just a little….so I rummaged through, and pulled out some items and got busy that evening.

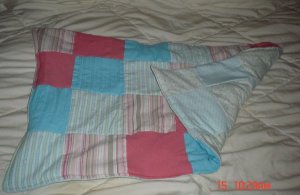
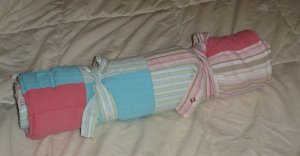
Once I had started, I realized that there was still a very strong lingering of her mother’s perfume on these items, and so I told myself I needed to work really fast so that I could present it, with the scent of her mother still ‘alive’ on it.  So…I was up until midnight…cutting, pressing, sewing….and I came up with just a small little lap quilt, or, as I’ve shown here, a neat little roll pillow….

It was just one small thing, that I could do…..

quilt2


quilt1

Tutorial – How to make a scarf from t-shirts

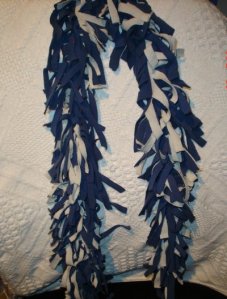
Here is my very first repurposed project tutorial to make a rag scarf.

ragscarf2

It took me about an hour and a half from start to finish….no sewing machine required.

ragscarf11

MATERIALS REQUIRED:

3 t-shirts of any color combination.  ( they can have bleach marks or stains, it doesn’t really matter)

1 needle and thread

Scissors – they should be fabric scissors or else you may have blisters before you are done.

scarftut1


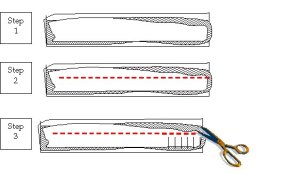
Step 1 – find three lengths of t-shirt fabric.  They can be alternating colors or the same color.  It’s fun to use different textures and patterns.  They can be the same width or slightly different as shown in the drawing.  Cut pieces as long or as short and as wide as you’d like – you have lots of flexibility!  For an extra long scarf you could sew two pieces together.

Step 2 – Either hand sew or machine sew a straight line down the center of ( and through) all three fabrics.

Ste- 3 – using FABRIC scissors, cut on each side of the sewing line, just up to the thread.

That’s it!  You can wear it tonight!

**

  • RSS Visit my most recent posts here: